
Admin: default shortcuts
In Settings → Shortcuts, administrators configure the shortcuts shown to all employees by default. This display configuration does not grant permission to use a Skill.
Saved entries appear beneath the input in New chat. Employees select a task category and then an entry within it, so group names, icons, and order affect how easily they find the right shortcut.
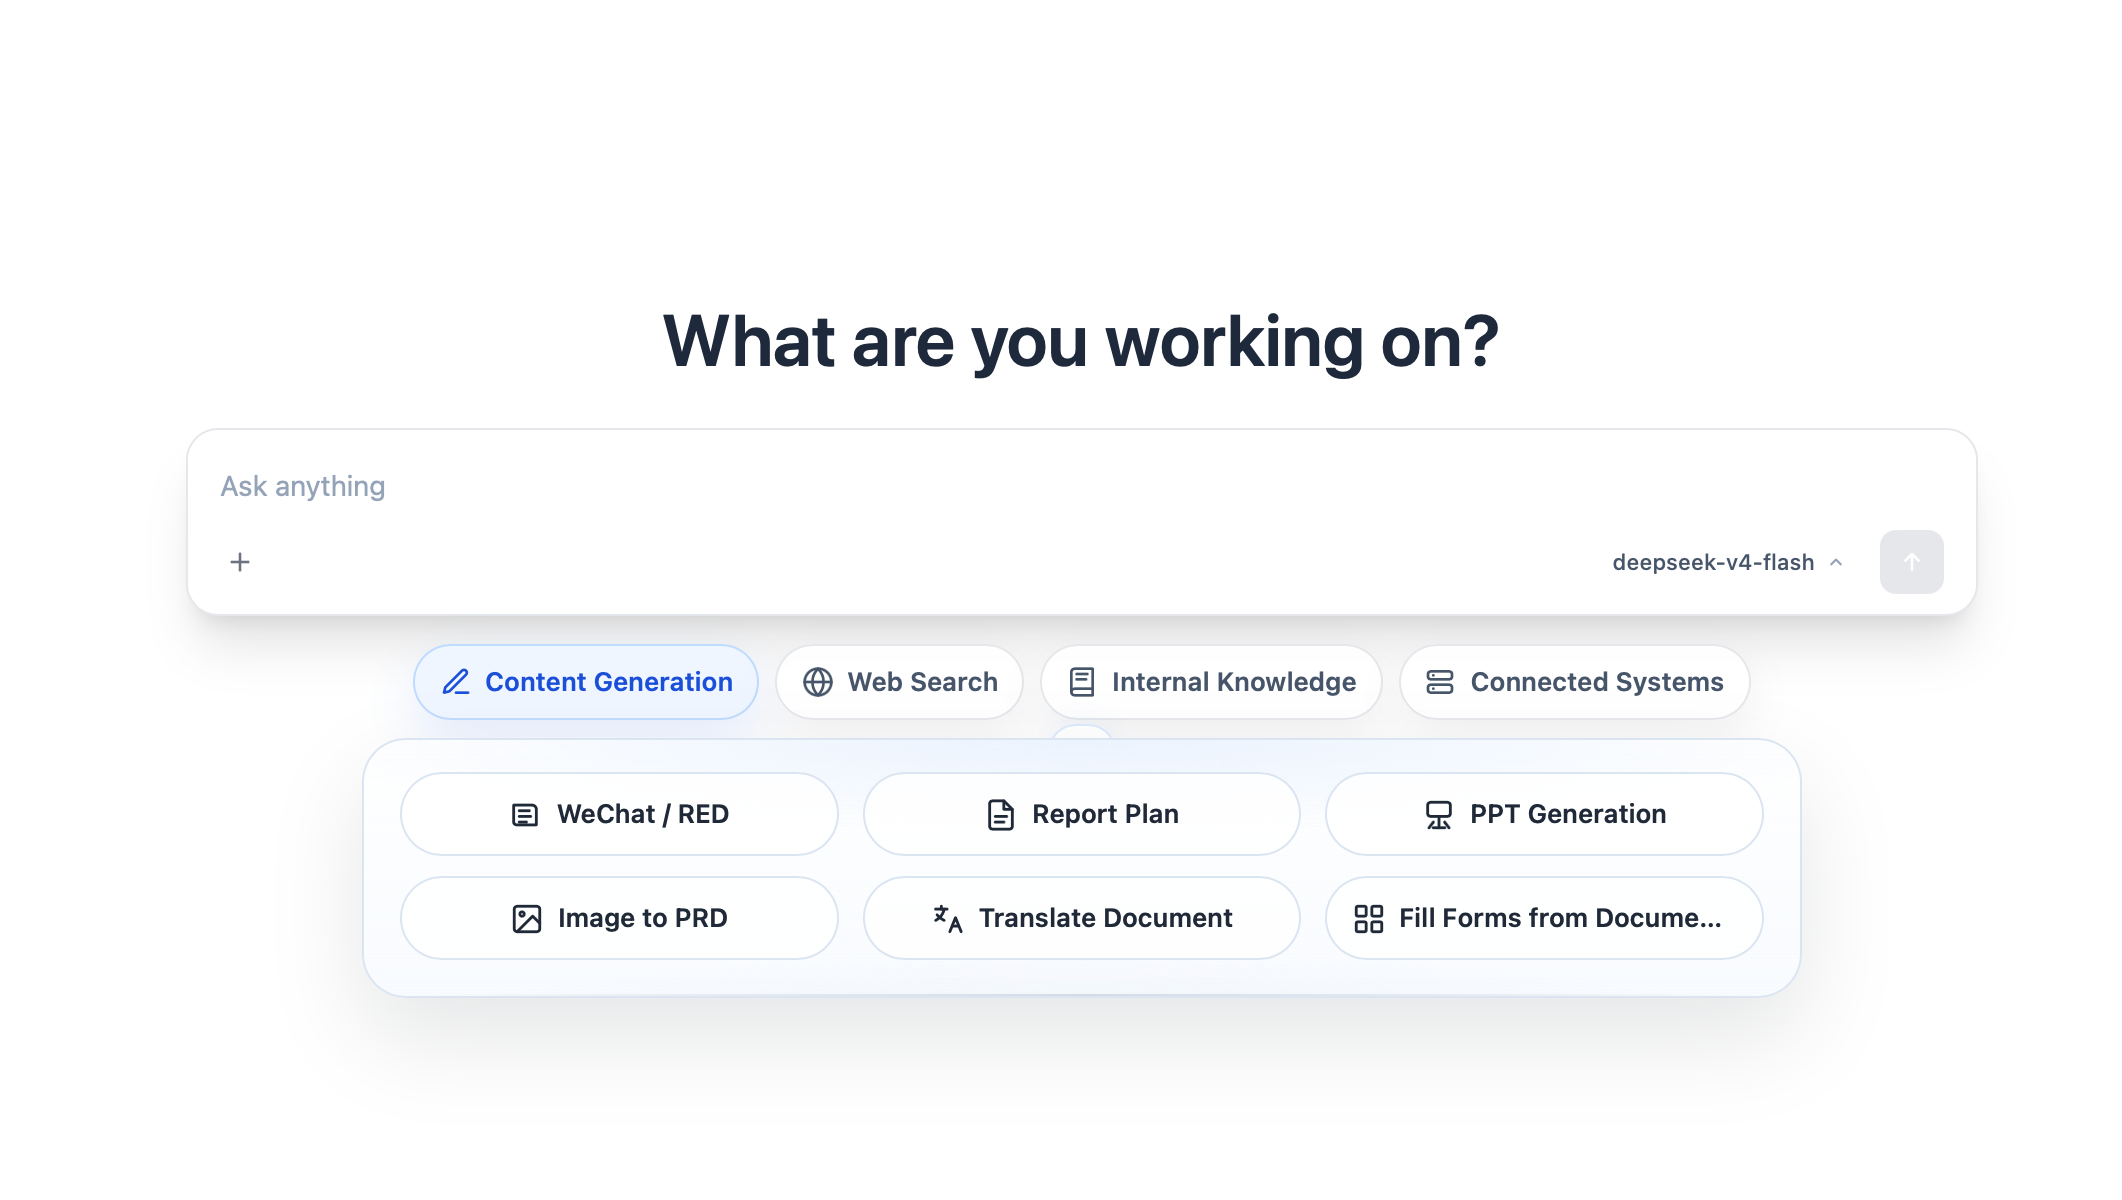
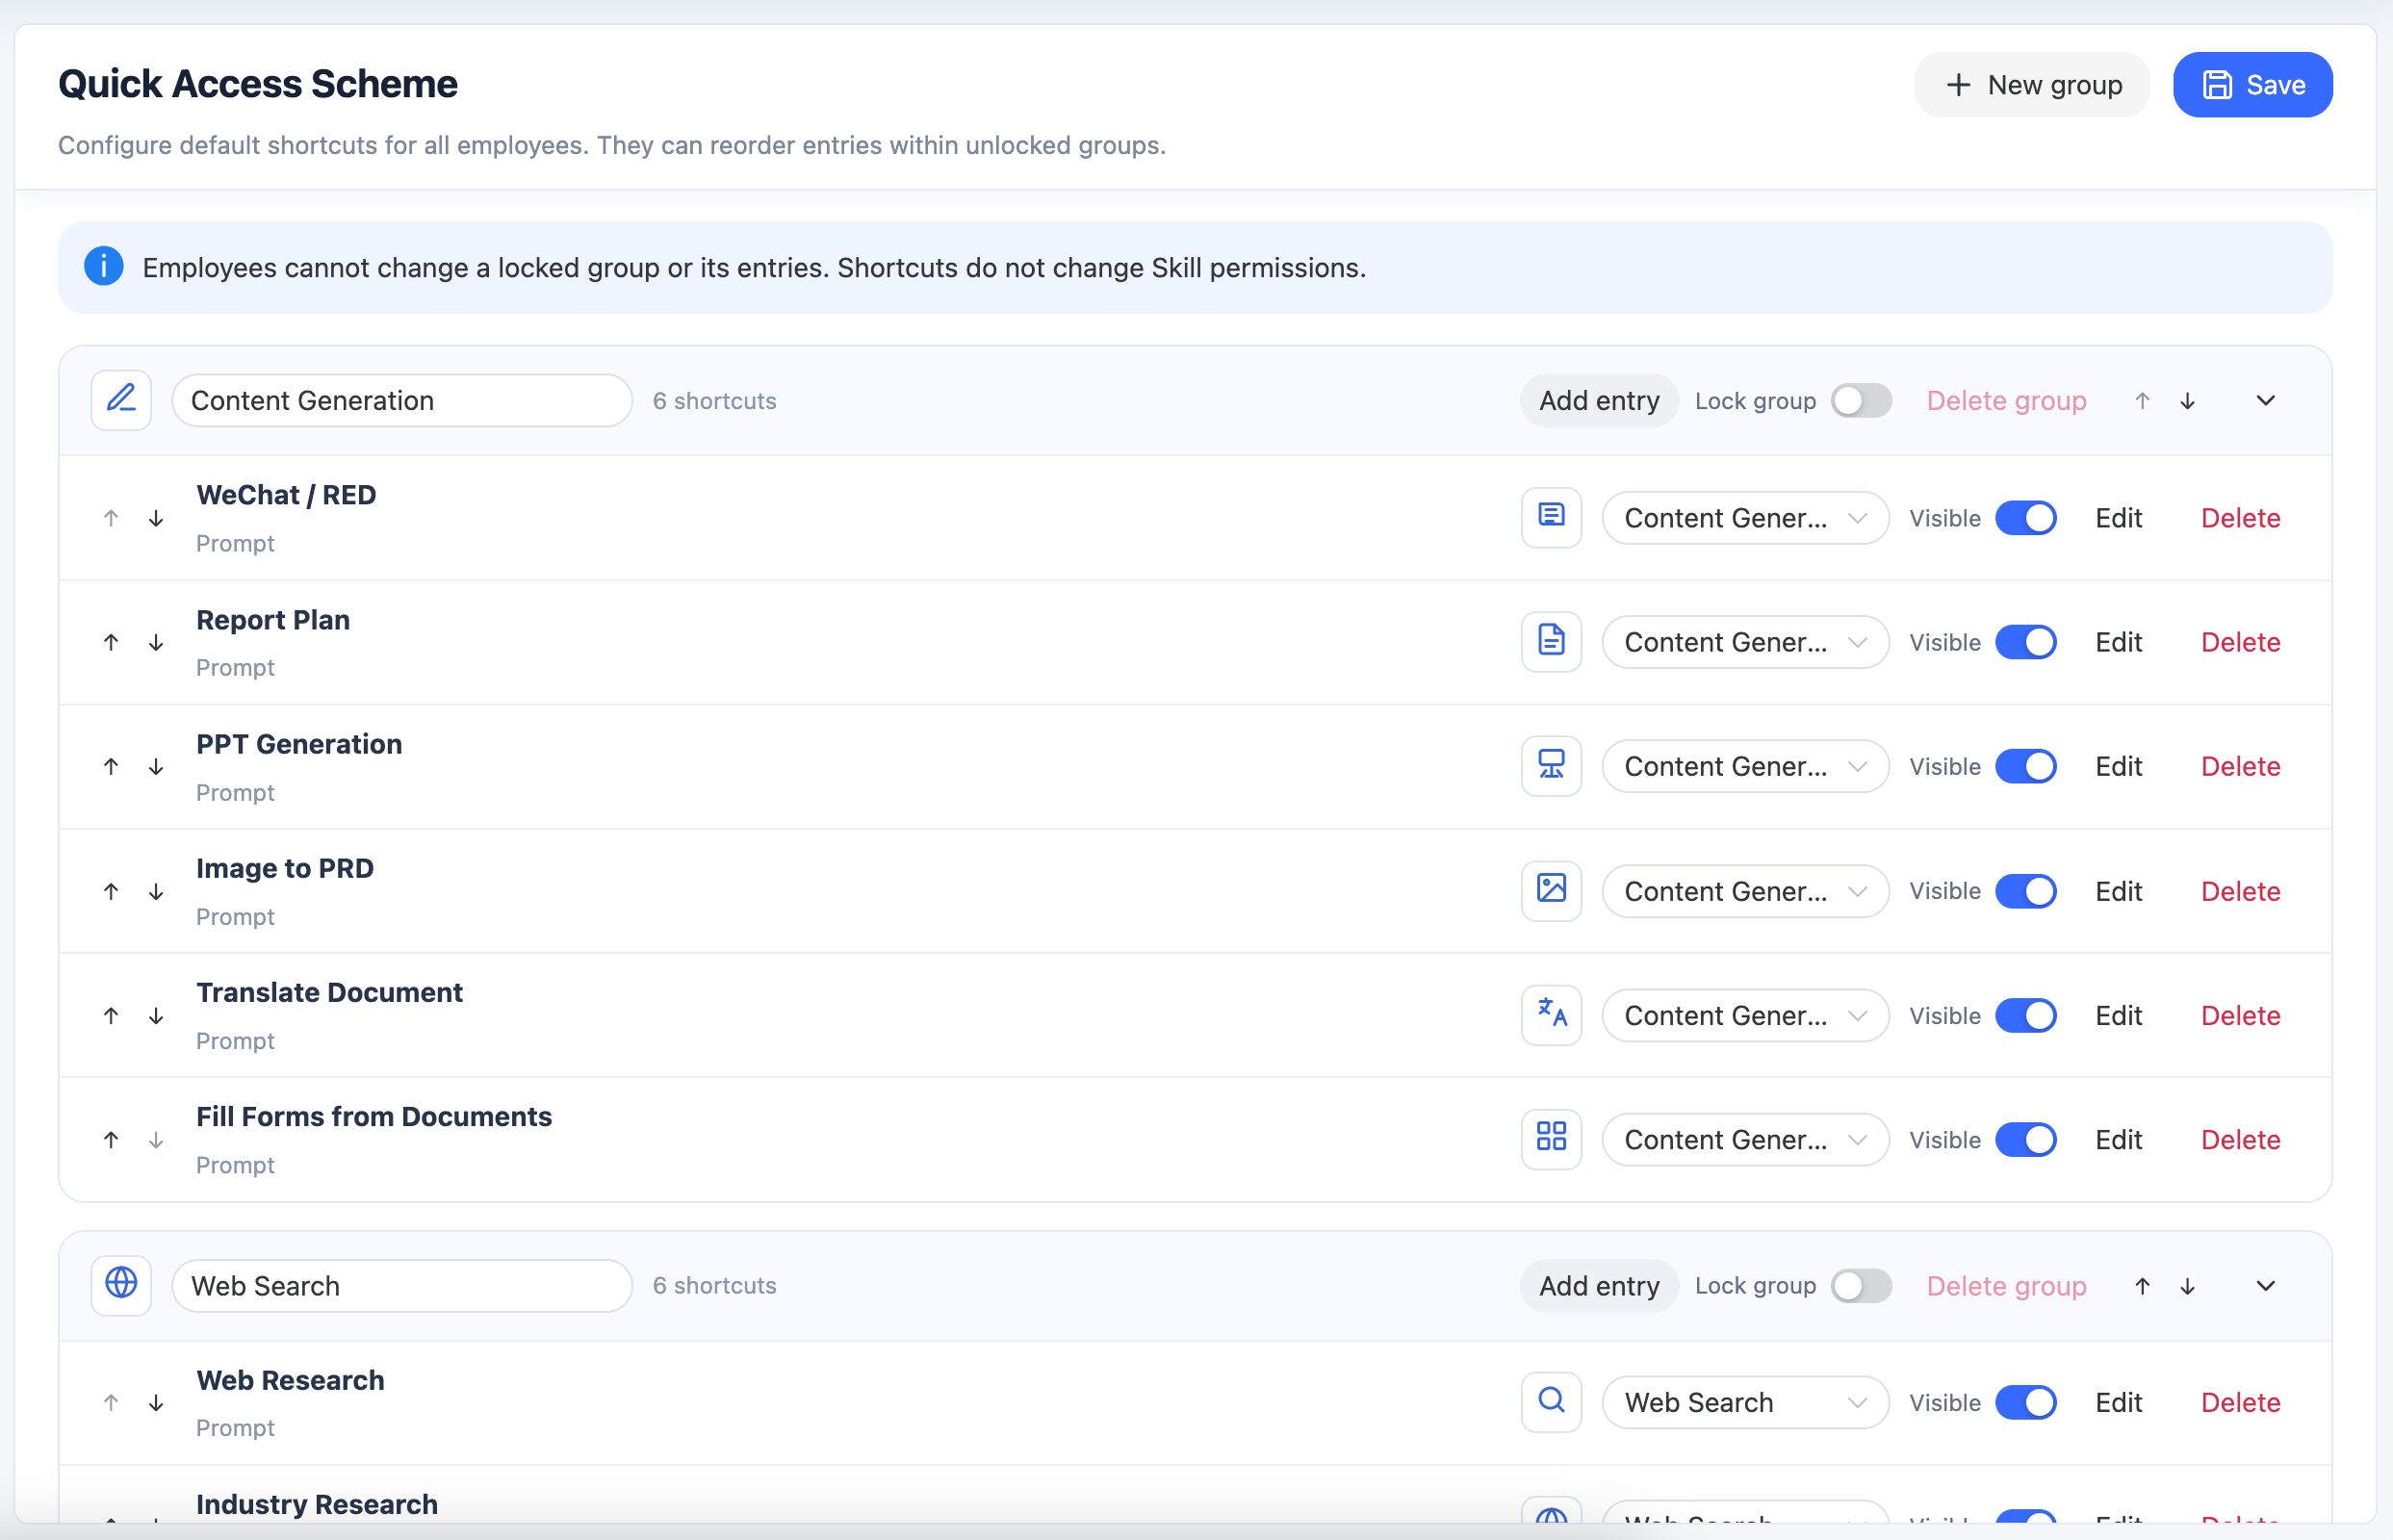
Create and arrange groups
Click New group, enter a name, and choose an icon. The default configuration supports up to 6 groups, with up to 6 entries per group. Groups can be expanded, collapsed, and reordered with the up/down controls. Rename a group or change its icon in its header. Remove its entries before deleting the group.
Use Lock group when employees must not change the group or its entries. Employees may reorder entries within an unlocked group. Locking a group never changes underlying Skill permissions.
Add and edit an entry
Click Add entry on the intended group card. Two types are available:
| Type | Admin configuration | When an employee clicks it |
|---|---|---|
| Prompt | Label and prompt text | Inserts the prompt into the conversation for review and sending |
| Skill | Label and target Skill | Automatically selects that Skill in the conversation |
The entry row also lets you change its group, visibility, content, or name, and delete it. A Skill shortcut is only a selection aid: a disabled, unpublished, or unauthorized Skill remains unavailable to the employee.
Choose icons and save
Click a group or entry icon to open the visual icon picker. Administrators may also upload an SVG or paste SVG markup. After safety validation, custom icons enter the organization-level library for later reuse and can be deleted. Keep SVGs simple and do not include secrets, personal data, or scripts.
After editing groups, entries, and their order, click Save configuration at the top. Confirm the saved state before leaving and verify the resulting order in the user workspace.
For employee adjustments, see Personal shortcuts.